DIY Eurorack ribbon power cables
DIY Eurorack ribbon power cables tutorial
Eurorack modules generaly need + and – 12vdc and a few (mostly new digital ones) requires also +5vdc. This current goes into your power supply, then goes to the bussboard using the 16-16 pins IDC ribbon cable. The buss board distributes this power to modules with 10-16 pins or 16-16 pins IDC connectors.
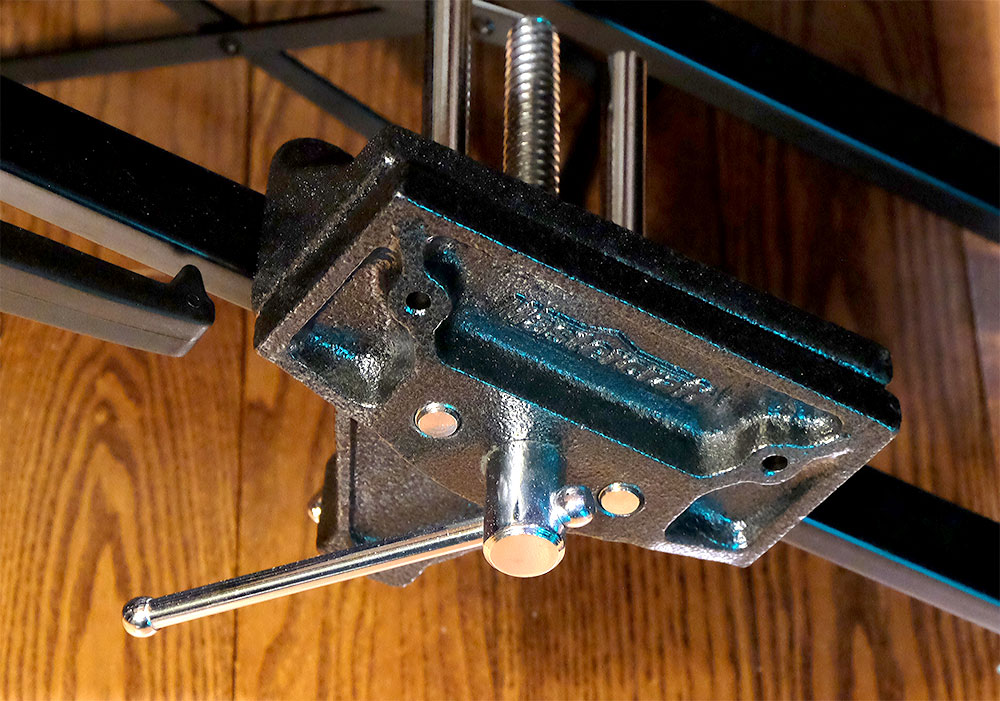
It’s really simple to make them yourself if you have a bench vice similar to the one on the picture below. It’s really easy to break theses IDC connectors without a proper tool, save your modules from death!
Bench vice
The advantage of making your own ribbon cable is that you’ll be able to cut your own lenght and it’s cheaper than buying them, if you make many obviously… I would not suggest going more than 20 inch or so, especially if you have many of that lengh next to each other.
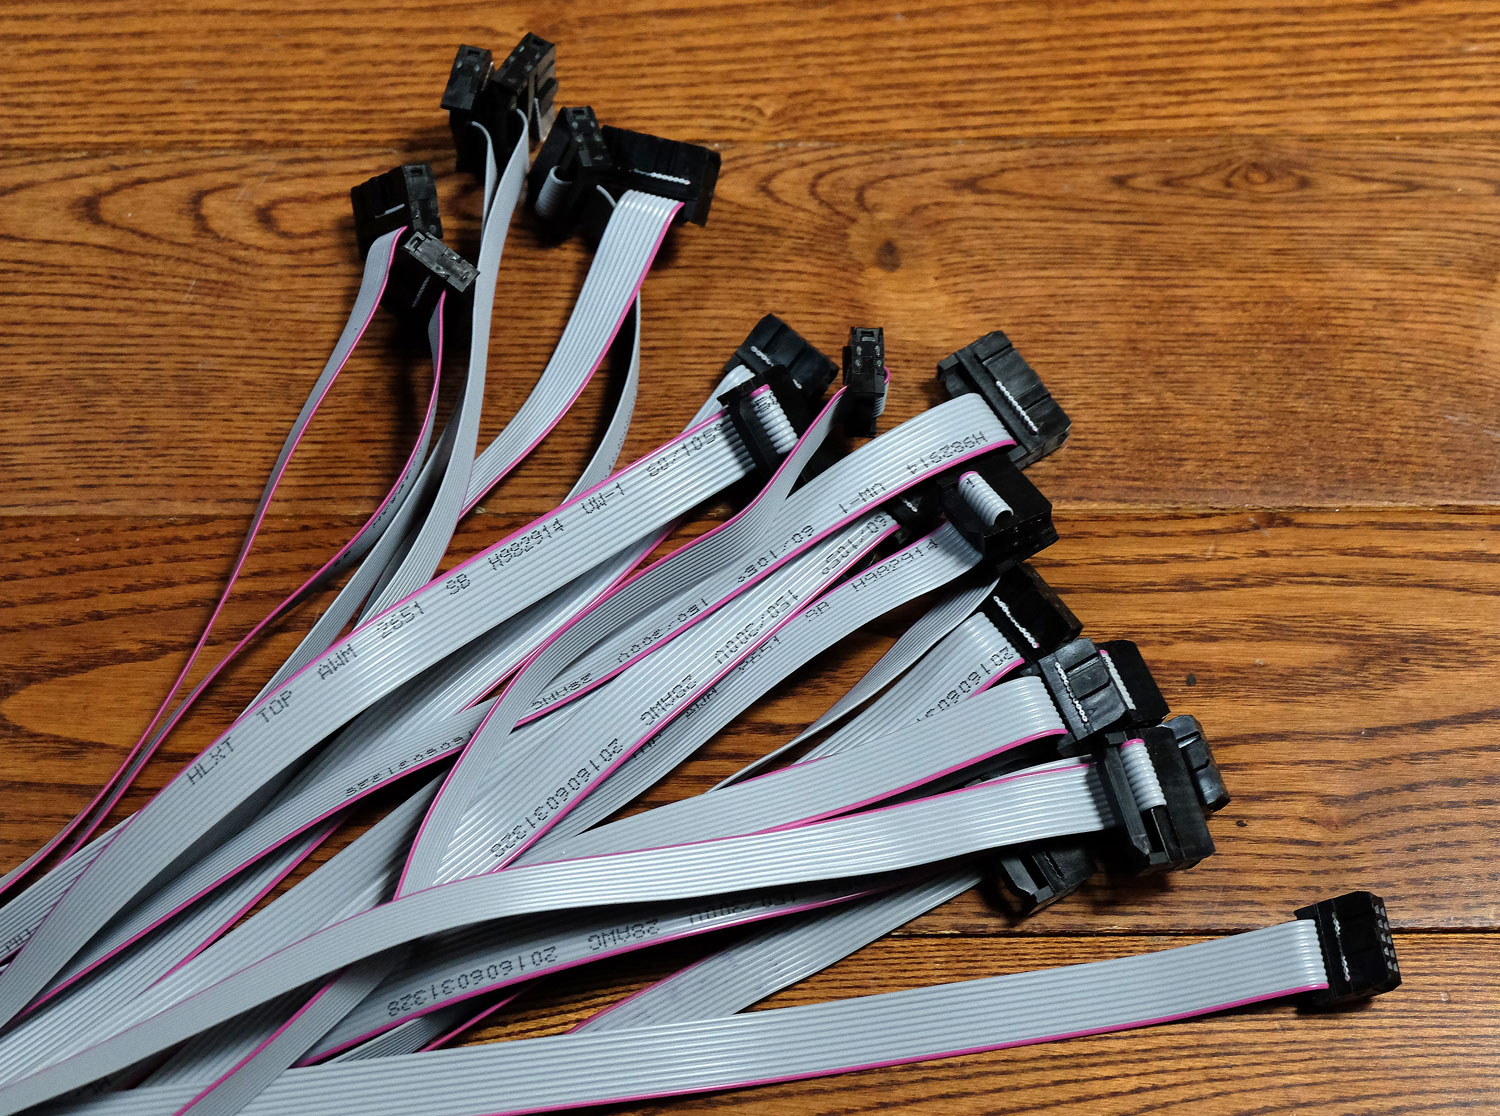
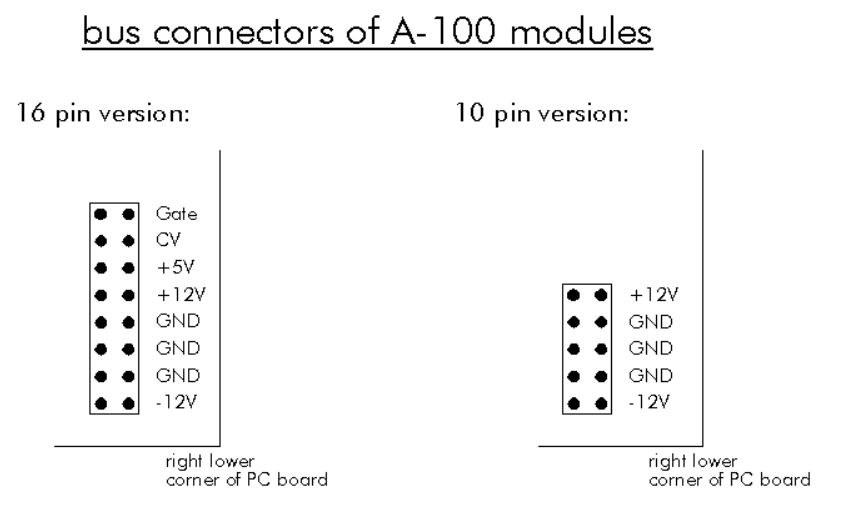
There’s 2 types of eurorack cables :
10 to 16 pins
16 to 16 pins

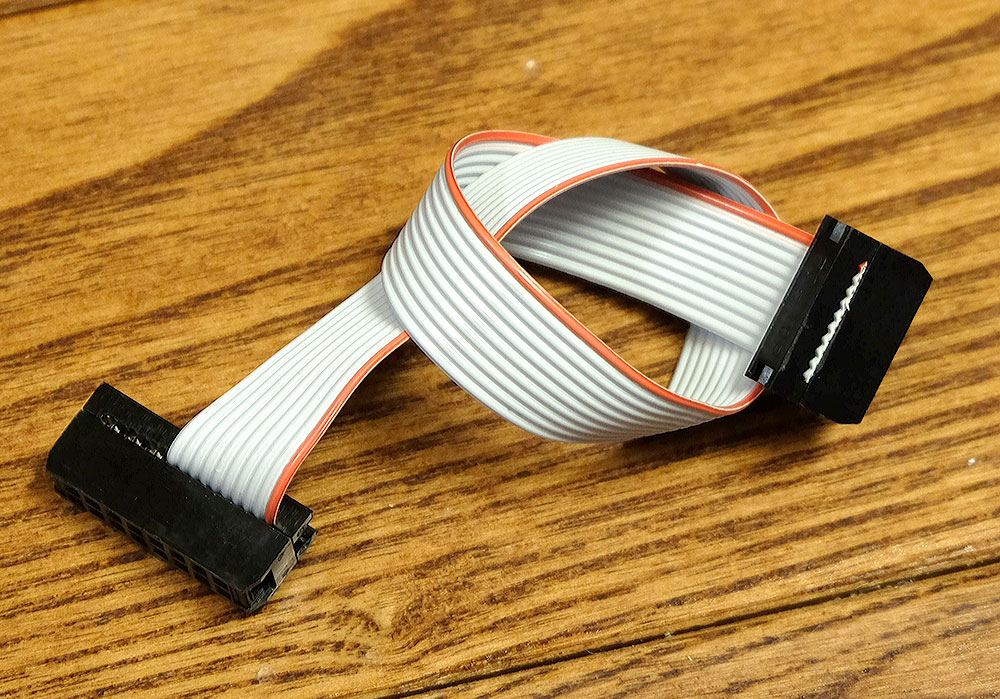
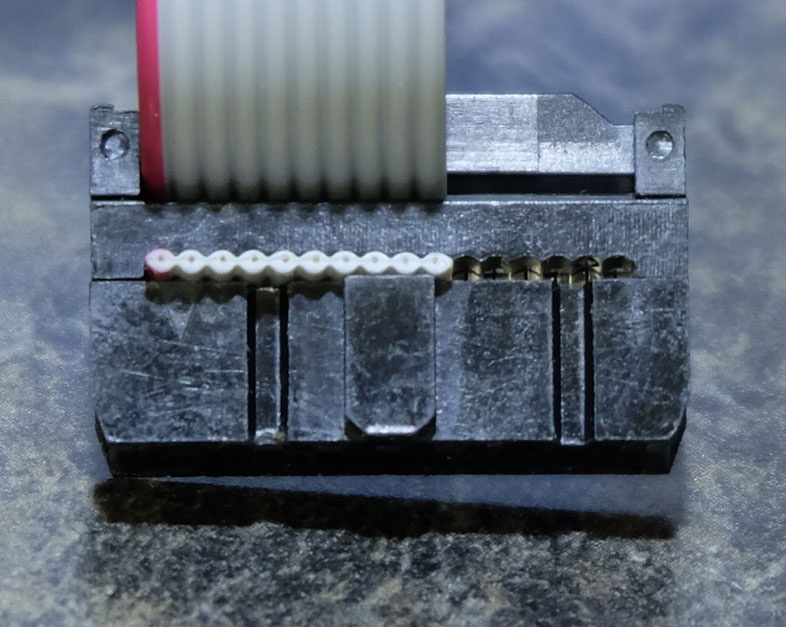
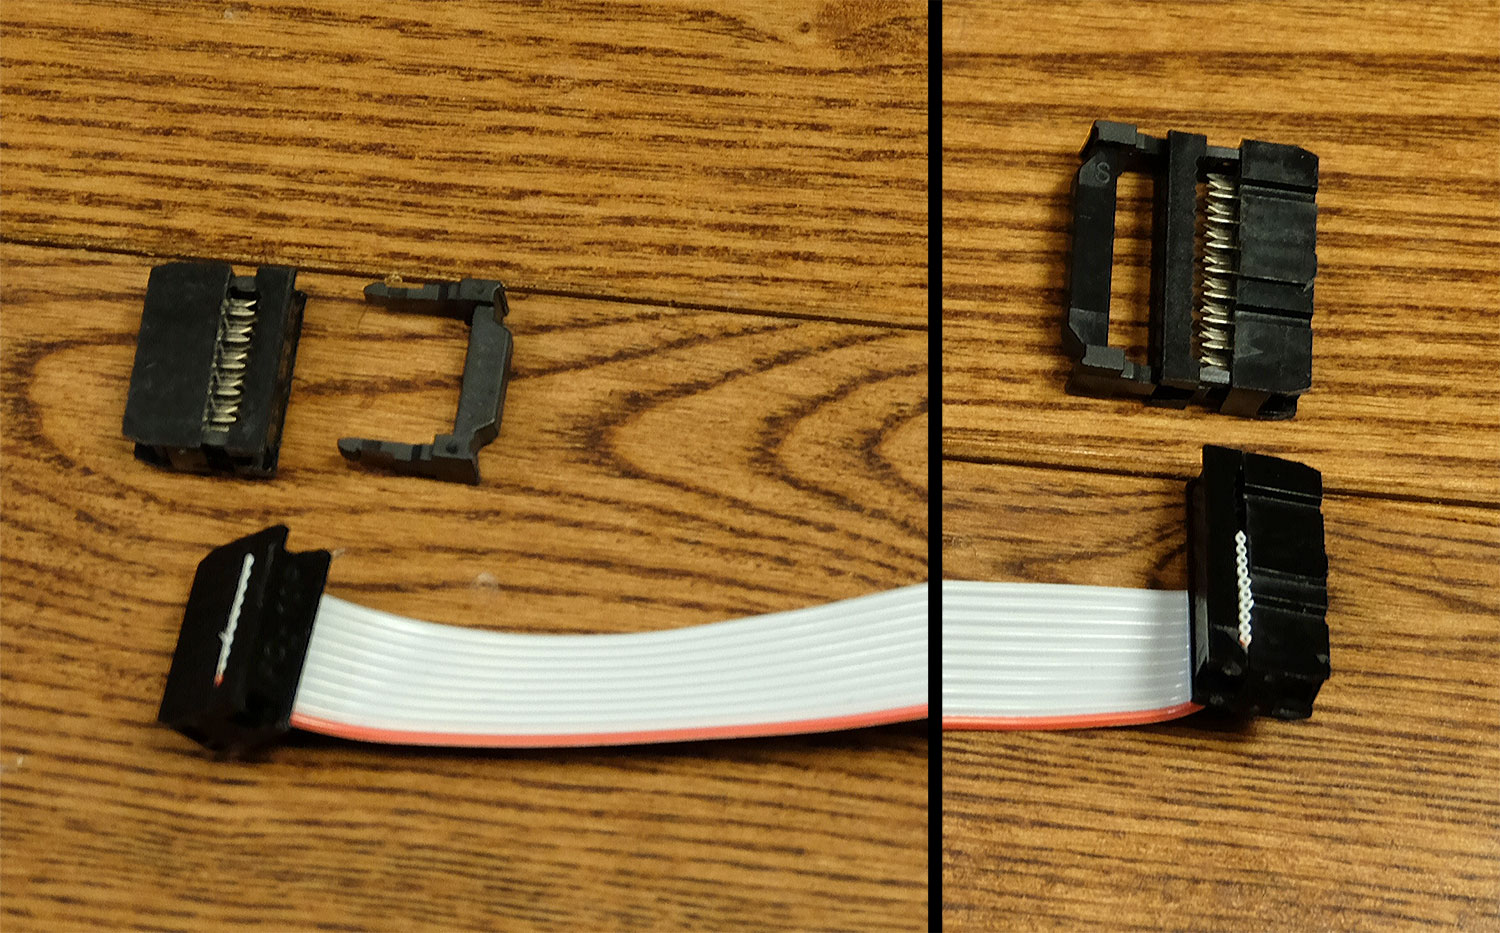
Make sure to align them correctly
Here you can clearly see each wire going into each connector, make sure each one is well alligned and then use the bench vice so that each connexion bites properly in each wire.
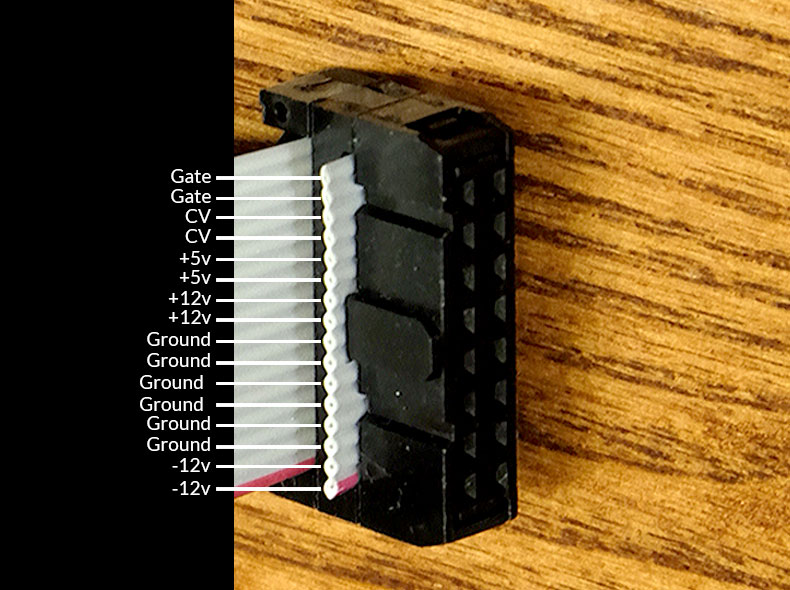
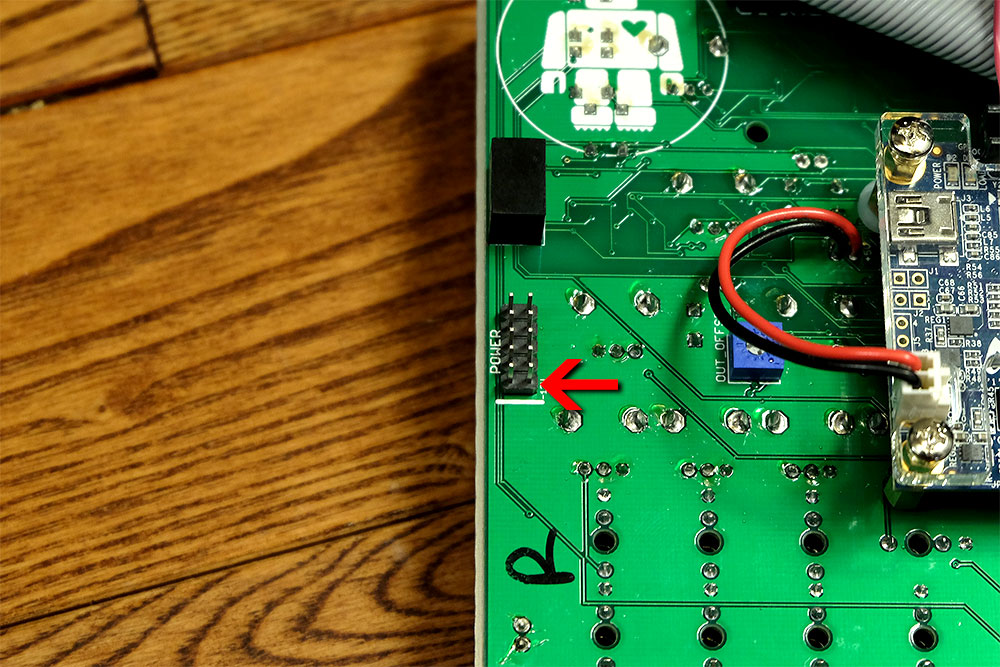
The small arrow at the left on the image below points the pin1 (red stripe).
Always check near the connector header pins on the module pcb for the red stripe -12v position indication or on the manual. Some modules uses reverse power protection, some doesn’t, just don’t take the chance and double check your cables.
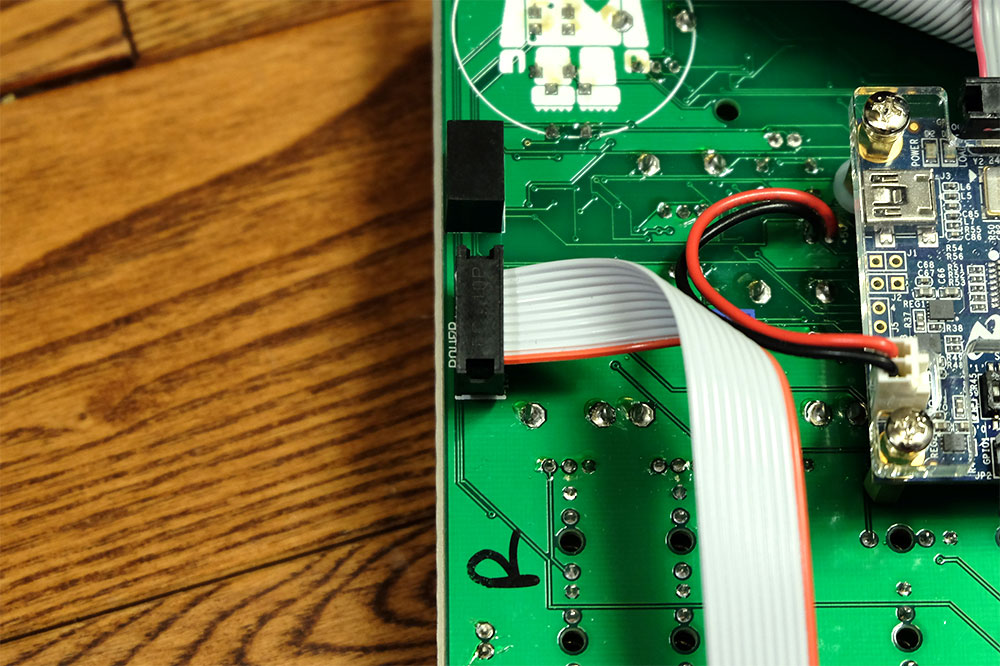
So here’s how you connect the ribbon cable
The red line is usualy telling where is the -12v but again, make sure to check this on your manual if there is no indication on the PCB board. There is good chances that it will blow up your module if the module does not have reverse power protection and you connect it wrong.
On this example i show the -12v pins next to that red arrow. This is Intellijel Shapeshifter.
Cable lock
You can buy them on ebay for example and get a big roll of ribbon cable with a bench vice and you will save money. Some comes with cable lock on the top but honestly if you don’t pull from the cable it’s not necessary, always pull from the connector and you’ll be fine. For more details you can refer on Doepfer website
Before you power your system
It’s always good to test your cables before powering on your modular system. I like to test them with a simple voltmeter. Just connect each side to each side and compare them with each hole in the connector to see if there’s some wires that toutch the next one to it. If your voltmeter pins are not enough small to enter in idc connectors holes, just tape a small metal pin to them.
Connect the black one to the -12v of the left side of your ribbon cable, and connect the red one to the other -12v on the other side of the ribbon cable, then compare it with the holes next to each others.